Building applications with WPF, MVVM and Prism(aka CAG)
Posted
by skjagini
on ASP.net Weblogs
See other posts from ASP.net Weblogs
or by skjagini
Published on Wed, 02 Feb 2011 05:12:00 GMT
Indexed on
2011/02/02
7:26 UTC
Read the original article
Hit count: 2137
In this article I am going to walk through an application using WPF and Prism (aka composite application guidance, CAG) which simulates engaging a taxi (cab).
The rules are simple, the app would have3 screens
- A login screen to authenticate the user
- An information screen.
- A screen to engage the cab and roam around and calculating the total fare
Metered Rate of Fare
The meter is required to be engaged when a cab is occupied by anyone
$3.00 upon entry
$0.35 for each additional unit
The unit fare is:
- one-fifth of a mile, when the cab is traveling at 6 miles an hour or more; or
- 60 seconds when not in motion or traveling at less than 12 miles per hour.
- Night surcharge of $.50 after 8:00 PM & before 6:00 AM
- Peak hour Weekday Surcharge of $1.00 Monday - Friday after 4:00 PM & before 8:00 PM
- New York State Tax Surcharge of $.50 per ride.
Example:
- Friday (2010-10-08)
- 5:30pm
- Start at Lexington Ave & E 57th St
- End at Irving Pl & E 15th St
- Start = $3.00
- Travels 2 miles at less than 6 mph for 15 minutes = $3.50
- Travels at more than 12 mph for 5 minutes = $1.75
- Peak hour Weekday Surcharge = $1.00 (ride started at 5:30 pm)
- New York State Tax Surcharge = $0.50
Before we dive into the app, I would like to give brief description about the framework. If you want to jump on to the source code, scroll all the way to the end of the post.
MVVM
MVVM pattern is in no way related to the usage of PRISM in your application and should be considered if you are using WPF irrespective of PRISM or not.
Lets say you are not familiar with MVVM, your typical UI would involve adding some UI controls like text boxes, a button, double clicking on the button, generating event handler, calling a method from business layer and updating the user interface, it works most of the time for developing small scale applications. The problem with this approach is that there is some amount of code specific to business logic wrapped in UI specific code which is hard to unit test it, mock it and MVVM helps to solve the exact problem.
MVVM stands for Model(M) – View(V) – ViewModel(VM), based on the interactions with in the three parties it should be called VVMM, MVVM sounds more like MVC (Model-View-Controller) so the name.
Why it should be called VVMM: View – View Model - Model
WPF allows to create user interfaces using XAML and MVVM takes it to the next level by allowing complete separation of user interface and business logic.
In WPF each view will have a property, DataContext when set to an instance of a class (which happens to be your view model) provides the data the view is interested in, i.e., view interacts with view model and at the same time view model interacts with view through DataContext. Sujith, if view and view model are interacting directly with each other how does MVVM is helping me separation of concerns? Well, the catch is DataContext is of type Object, since it is of type object view doesn’t know exact type of view model allowing views and views models to be loosely coupled.
View models aggregate data from models (data access layer, services, etc) and make it available for views through properties, methods etc, i.e., View Models interact with Models.
PRISM
Prism is provided by Microsoft Patterns and Practices team and it can be downloaded from codeplex for source code, samples and documentation on msdn. The name composite implies, to compose user interface from different modules (views) without direct dependencies on each other, again allowing loosely coupled development.
Well Sujith, I can already do that with user controls, why shall I learn another framework? That’s correct, you can decouple using user controls, but you still have to manage some amount of coupling, like how to do you communicate between the controls, how do you subscribe/unsubscribe, loading/unloading views dynamically. Prism is not a replacement for user controls, provides the following features which greatly help in designing the composite applications.
- Dependency Injection (DI)/ Inversion of Control (IoC)
- Modules
- Regions
- Event Aggregator
- Commands
Simply put, MVVM helps building a single view and Prism helps building an application using the views
There are other open source alternatives to Prism, like MVVMLight, Cinch, take a look at them as well.
Lets dig into the source code.
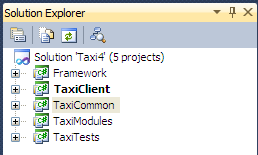
1. Solution
The solution is made of the following projects

- Framework: Holds the common functionality in building applications using WPF and Prism
- TaxiClient: Start up project, boot strapping and app styling
- TaxiCommon: Helps with the business logic
- TaxiModules: Holds the meat of the application with views and view models
- TaxiTests: To test the application
2. DI / IoC
Dependency Injection (DI) as the name implies refers to injecting dependencies and Inversion of Control (IoC) means the calling code has no direct control on the dependencies, opposite of normal way of programming where dependencies are passed by caller, i.e inversion; aside from some differences in terminology the concept is same in both the cases.
The idea behind DI/IoC pattern is to reduce the amount of direct coupling between different components of the application, the higher the dependency the more tightly coupled the application resulting in code which is hard to modify, unit test and mock.
Initializing Dependency Injection through BootStrapper
TaxiClient is the starting project of the solution and App (App.xaml) is the starting class that gets called when you run the application.

From the App’s OnStartup method we will invoke BootStrapper.
namespace TaxiClient
{
/// <summary>
/// Interaction logic for App.xaml
/// </summary>
public partial class App : Application
{
protected override void OnStartup(StartupEventArgs e)
{
base.OnStartup(e);
(new BootStrapper()).Run();
}
}
}
BootStrapper is your contact point for initializing the application including dependency injection, creating Shell and other frameworks. We are going to use Unity for DI and there are lot of open source DI frameworks like Spring.Net, StructureMap etc with different feature set and you can choose a framework based on your preferences. Note that Prism comes with in built support for Unity, for example we are deriving from UnityBootStrapper in our case and for any other DI framework you have to extend the Prism appropriately
namespace TaxiClient
{
public class BootStrapper: UnityBootstrapper
{
protected override IModuleCatalog CreateModuleCatalog()
{
return new ConfigurationModuleCatalog();
}
protected override DependencyObject CreateShell()
{
Framework.FrameworkBootStrapper.Run(Container, Application.Current.Dispatcher);
Shell shell = new Shell();
shell.ResizeMode = ResizeMode.NoResize;
shell.Show();
return shell;
}
}
}
Lets take a look into FrameworkBootStrapper to check out how to register with unity container.
namespace Framework
{
public class FrameworkBootStrapper
{
public static void Run(IUnityContainer container, Dispatcher dispatcher)
{
UIDispatcher uiDispatcher = new UIDispatcher(dispatcher);
container.RegisterInstance<IDispatcherService>(uiDispatcher);
container.RegisterType<IInjectSingleViewService, InjectSingleViewService>(
new ContainerControlledLifetimeManager());
. . .
}
}
}
In the above code we are registering two components with unity container. You shall observe that we are following two different approaches, RegisterInstance and RegisterType. With RegisterInstance we are registering an existing instance and the same instance will be returned for every request made for IDispatcherService and with RegisterType we are requesting unity container to create an instance for us when required, i.e., when I request for an instance for IInjectSingleViewService, unity will create/return an instance of InjectSingleViewService class and with RegisterType we can configure the life time of the instance being created. With ContaienrControllerLifetimeManager, the unity container caches the instance and reuses for any subsequent requests, without recreating a new instance.
Lets take a look into FareViewModel.cs and it’s constructor. The constructor takes one parameter IEventAggregator and if you try to find all references in your solution for IEventAggregator, you will not find a single location where an instance of EventAggregator is passed directly to the constructor. The compiler still finds an instance and works fine because Prism is already configured when used with Unity container to return an instance of EventAggregator when requested for IEventAggregator and in this particular case it is called constructor injection.
public class FareViewModel:ObservableBase, IDataErrorInfo
{
...
private IEventAggregator _eventAggregator;
public FareViewModel(IEventAggregator eventAggregator)
{
_eventAggregator = eventAggregator;
InitializePropertyNames();
InitializeModel();
PropertyChanged += OnPropertyChanged;
}
...
3. Shell
Shells are very similar in operation to Master Pages in asp.net or MDI in Windows Forms. And shells contain regions which display the views, you can have as many regions as you wish in a given view. You can also nest regions. i.e, one region can load a view which in itself may contain other regions.
We have to create a shell at the start of the application and are doing it by overriding CreateShell method from BootStrapper
From the following Shell.xaml you shall notice that we have two content controls with Region names as ‘MenuRegion’ and ‘MainRegion’. The idea here is that you can inject any user controls into the regions dynamically, i.e., a Menu User Control for MenuRegion and based on the user action you can load appropriate view into MainRegion.
<Window x:Class="TaxiClient.Shell"
xmlns="http://schemas.microsoft.com/winfx/2006/xaml/presentation"
xmlns:x="http://schemas.microsoft.com/winfx/2006/xaml"
xmlns:Regions="clr-namespace:Microsoft.Practices.Prism.Regions;assembly=Microsoft.Practices.Prism"
Title="Taxi" Height="370" Width="800">
<Grid Margin="2">
<ContentControl
Regions:RegionManager.RegionName="MenuRegion"
HorizontalAlignment="Stretch"
VerticalAlignment="Stretch"
HorizontalContentAlignment="Stretch"
VerticalContentAlignment="Stretch" />
<ContentControl Grid.Row="1"
Regions:RegionManager.RegionName="MainRegion"
HorizontalAlignment="Stretch"
VerticalAlignment="Stretch"
HorizontalContentAlignment="Stretch"
VerticalContentAlignment="Stretch" />
<!--<Border Grid.ColumnSpan="2" BorderThickness="2" CornerRadius="3" BorderBrush="LightBlue" />-->
</Grid>
</Window>
4. Modules
Prism provides the ability to build composite applications and modules play an important role in it.
For example if you are building a Mortgage Loan Processor application with 3 components, i.e. customer’s credit history, existing mortgages, new home/loan information; and consider that the customer’s credit history component involves gathering data about his/her address, background information, job details etc. The idea here using Prism modules is to separate the implementation of these 3 components into their own visual studio projects allowing to build components with no dependency on each other and independently. If we need to add another component to the application, the component can be developed by in house team or some other team in the organization by starting with a new Visual Studio project and adding to the solution at the run time with very little knowledge about the application.
Prism modules are defined by implementing the IModule interface and each visual studio project to be considered as a module should implement the IModule interface. From the BootStrapper.cs you shall observe that we are overriding the method by returning a ConfiguratingModuleCatalog which returns the modules that are registered for the application using the app.config file and you can also add module using code.
Lets take a look into configuration file.
<?xml version="1.0"?>
<configuration>
<configSections>
<section name="modules"
type="Microsoft.Practices.Prism.Modularity.ModulesConfigurationSection, Microsoft.Practices.Prism"/>
</configSections>
<modules>
<module assemblyFile="TaxiModules.dll" moduleType="TaxiModules.ModuleInitializer, TaxiModules"
moduleName="TaxiModules"/>
</modules>
</configuration>
Here we are adding TaxiModules project to our solution and TaxiModules.ModuleInitializer implements IModule interface
5. Module Mapper
With Prism modules you can dynamically add or remove modules from the regions, apart from that Prism also provides API to control adding/removing the views from a region within the same module.
Taxi Information Screen:

Engage the Taxi Screen:

The sample application has two screens, ‘Taxi Information’ and ‘Engage the Taxi’ and they both reside in same module, TaxiModules. ‘Engage the Taxi’ is again made of two user controls, FareView on the left and TotalView on the right. We have created a Shell with two regions, MenuRegion and MainRegion with menu loaded into MenuRegion. We can create a wrapper user control called EngageTheTaxi made of FareView and TotalView and load either TaxiInfo or EngageTheTaxi into MainRegion based on the user action. Though it will work it tightly binds the user controls and for every combination of user controls, we need to create a dummy wrapper control to contain them. Instead we can apply the principles we learned so far from Shell/regions and introduce another template (LeftAndRightRegionView.xaml) made of two regions Region1 (left) and Region2 (right) and load FareView and TotalView dynamically.

To help with loading of the views dynamically I have introduce an helper an interface, IInjectSingleViewService, idea suggested by Mike Taulty, a must read blog for .Net developers.
using System;
using System.Collections.Generic;
using System.ComponentModel;
namespace Framework.PresentationUtility.Navigation
{
public interface IInjectSingleViewService : INotifyPropertyChanged
{
IEnumerable<CommandViewDefinition> Commands { get; }
IEnumerable<ModuleViewDefinition> Modules { get; }
void RegisterViewForRegion(string commandName, string viewName, string regionName, Type viewType);
void ClearViewFromRegion(string viewName, string regionName);
void RegisterModule(string moduleName, IList<ModuleMapper> moduleMappers);
}
}
The Interface declares three methods to work with views:
- RegisterViewForRegion: Registers a view with a particular region. You can register multiple views and their regions under one command. When this particular command is invoked all the views registered under it will be loaded into their regions.
- ClearViewFromRegion: To unload a specific view from a region.
- RegisterModule: The idea is when a command is invoked you can load the UI with set of controls in their default position and based on the user interaction, you can load different contols in to different regions on the fly. And it is supported ModuleViewDefinition and ModuleMappers as shown below.
namespace Framework.PresentationUtility.Navigation{public class ModuleViewDefinition{public string ModuleName { get; set; }public IList<ModuleMapper> ModuleMappers;public ICommand Command { get; set; }}public class ModuleMapper{public string ViewName { get; set; }public string RegionName { get; set; }public Type ViewType { get; set; }}}
6. Event Aggregator
Prism event aggregator enables messaging between components as in Observable pattern, Notifier notifies the Observer which receives notification it is interested in.
When it comes to Observable pattern, Observer has to unsubscribes for notifications when it no longer interested in notifications, which allows the Notifier to remove the Observer’s reference from it’s local cache. Though .Net has managed garbage collection it cannot remove inactive the instances referenced by an active instance resulting in memory leak, keeping the Observers in memory as long as Notifier stays in memory.
Developers have to be very careful to unsubscribe when necessary and it often gets overlooked, to overcome these problems Prism Event Aggregator uses weak references to cache the reference (Observer in this case) and releases the reference (memory) once the instance goes out of scope.
Using event aggregator is very simple, declare a generic type of CompositePresenationEvent by inheriting from it.
using Microsoft.Practices.Prism.Events;
using TaxiCommon.BAO;
namespace TaxiCommon.CompositeEvents
{
public class TaxiOnMoveEvent:CompositePresentationEvent<TaxiOnMove>
{
}
}
TaxiOnMove.cs includes the properties which we want to exchange between the parties, FareView and TotalView.
using System;
namespace TaxiCommon.BAO
{
public class TaxiOnMove
{
public TimeSpan MinutesAtTweleveMPH { get; set; }
public double MilesAtSixMPH { get; set; }
}
}
Lets take a look into FareViewodel (Notifier) and how it raises the event. Here we are raising the event by getting the event through GetEvent<..>() and publishing it with the payload
private void OnAddMinutes(object obj)
{
TaxiOnMove payload = new TaxiOnMove();
if(MilesAtSixMPH != null) payload.MilesAtSixMPH = MilesAtSixMPH.Value;
if(MinutesAtTweleveMPH != null) payload.MinutesAtTweleveMPH =
new TimeSpan(0,0,MinutesAtTweleveMPH.Value,0);
_eventAggregator.GetEvent<TaxiOnMoveEvent>().Publish(payload);
ResetMinutesAndMiles();
}
And TotalViewModel(Observer) subscribes to notifications by getting the event through GetEvent<..>()
namespace TaxiModules.ViewModels
{
public class TotalViewModel:ObservableBase
{
....
private IEventAggregator _eventAggregator;
public TotalViewModel(IEventAggregator eventAggregator)
{
_eventAggregator = eventAggregator;
...
}
private void SubscribeToEvents()
{
_eventAggregator.GetEvent<TaxiStartedEvent>()
.Subscribe(OnTaxiStarted, ThreadOption.UIThread,false,(filter) => true);
_eventAggregator.GetEvent<TaxiOnMoveEvent>()
.Subscribe(OnTaxiMove, ThreadOption.UIThread, false, (filter) => true);
_eventAggregator.GetEvent<TaxiResetEvent>()
.Subscribe(OnTaxiReset, ThreadOption.UIThread, false, (filter) => true);
}
...
private void OnTaxiMove(TaxiOnMove taxiOnMove)
{
OnMoveFare fare = new OnMoveFare(taxiOnMove);
Fares.Add(fare);
SetTotalFare(new []{fare});
}
....
7. MVVM through example
In this section we are going to look into MVVM implementation through example. I have all the modules declared in a single project, TaxiModules, again it is not necessary to have them into one project.

Once the user logs into the application, will be greeted with the ‘Engage the Taxi’ screen which is made of two user controls, FareView.xaml and TotalView.Xaml. As you can see from the solution explorer, each of them have their own code behind files and ViewModel classes, FareViewMode.cs, TotalViewModel.cs
Lets take a look in to the FareView and how it interacts with FareViewModel using MVVM implementation. FareView.xaml acts as a view and FareViewMode.cs is it’s view model.
The FareView code behind class
namespace TaxiModules.Views
{
/// <summary>
/// Interaction logic for FareView.xaml
/// </summary>
public partial class FareView : UserControl
{
public FareView(FareViewModel viewModel)
{
InitializeComponent();
this.Loaded += (s, e) => { this.DataContext = viewModel; };
}
}
}
The FareView is bound to FareViewModel through the data context and you shall observe that DataContext is of type Object, i.e. the FareView doesn’t really know the type of ViewModel (FareViewModel). This helps separation of View and ViewModel as View and ViewModel are independent of each other, you can bind FareView to FareViewModel2 as well and the application compiles just fine.
Lets take a look into FareView xaml file
<UserControl x:Class="TaxiModules.Views.FareView"
xmlns="http://schemas.microsoft.com/winfx/2006/xaml/presentation"
xmlns:x="http://schemas.microsoft.com/winfx/2006/xaml"
xmlns:Toolkit="clr-namespace:Microsoft.Windows.Controls;assembly=WPFToolkit"
xmlns:Commands="clr-namespace:Microsoft.Practices.Prism.Commands;assembly=Microsoft.Practices.Prism">
<Grid Margin="10" >
....
<Border Style="{DynamicResource innerBorder}"
Grid.Row="0" Grid.Column="0" Grid.RowSpan="11" Grid.ColumnSpan="2" Panel.ZIndex="1"/>
<Label Grid.Row="0" Content="Engage the Taxi" Style="{DynamicResource innerHeader}"/>
<Label Grid.Row="1" Content="Select the State"/>
<ComboBox Grid.Row="1" Grid.Column="1" ItemsSource="{Binding States}" Height="auto">
<ComboBox.ItemTemplate>
<DataTemplate>
<TextBlock Text="{Binding Name}"/>
</DataTemplate>
</ComboBox.ItemTemplate>
<ComboBox.SelectedItem>
<Binding Path="SelectedState" Mode="TwoWay"/>
</ComboBox.SelectedItem>
</ComboBox>
<Label Grid.Row="2" Content="Select the Date of Entry"/>
<Toolkit:DatePicker Grid.Row="2" Grid.Column="1"
SelectedDate="{Binding DateOfEntry, ValidatesOnDataErrors=true}" />
<Label Grid.Row="3" Content="Enter time 24hr format"/>
<TextBox Grid.Row="3" Grid.Column="1" Text="{Binding TimeOfEntry, TargetNullValue=''}"/>
<Button Grid.Row="4" Grid.Column="1" Content="Start the Meter"
Commands:Click.Command="{Binding StartMeterCommand}" />
<Label Grid.Row="5" Content="Run the Taxi" Style="{DynamicResource innerHeader}"/>
<Label Grid.Row="6" Content="Number of Miles <@6mph"/>
<TextBox Grid.Row="6" Grid.Column="1"
Text="{Binding MilesAtSixMPH, TargetNullValue='', ValidatesOnDataErrors=true}"/>
<Label Grid.Row="7" Content="Number of Minutes @12mph"/>
<TextBox Grid.Row="7" Grid.Column="1" Text="{Binding MinutesAtTweleveMPH, TargetNullValue=''}"/>
<Button Grid.Row="8" Grid.Column="1" Content="Add Minutes and Miles "
Commands:Click.Command="{Binding AddMinutesCommand}"/>
<Label Grid.Row="9" Content="Other Operations" Style="{DynamicResource innerHeader}"/>
<Button Grid.Row="10" Grid.Column="1" Content="Reset the Meter"
Commands:Click.Command="{Binding ResetCommand}"/>
</Grid>
</UserControl>
The highlighted code from the above code shows data binding, for example ComboBox which displays list of states has it’s ItemsSource bound to States property, with DataTemplate bound to Name and SelectedItem to SelectedState. You might be wondering what are all these properties and how it is able to bind to them. The answer lies in data context, i.e., when you bound a control, WPF looks for data context on the root object (Grid in this case) and if it can’t find data context it will look into root’s root, i.e. FareView UserControl and it is bound to FareViewModel. Each of those properties have be declared on the ViewModel for the View to bind correctly.
To put simply, View is bound to ViewModel through data context of type object and every control that is bound on the View actually binds to the public property on the ViewModel.
Lets look into the ViewModel code (the following code is not an exact copy of FareViewMode.cs, pasted relevant code for this section)
namespace TaxiModules.ViewModels
{
public class FareViewModel:ObservableBase, IDataErrorInfo
{
public List<USState> States { get { return USStates.StateList; } }
public USState SelectedState
{
get { return _selectedState; }
set
{
_selectedState = value;
RaisePropertyChanged(_selectedStatePropertyName);
}
}
public DateTime? DateOfEntry
{
get { return _dateOfEntry; }
set
{
_dateOfEntry = value;
RaisePropertyChanged(_dateOfEntryPropertyName);
}
}
public TimeSpan? TimeOfEntry
{
get { return _timeOfEntry; }
set
{
_timeOfEntry = value;
RaisePropertyChanged(_timeOfEntryPropertyName);
}
}
public double? MilesAtSixMPH
{
get { return _milesAtSixMPH; }
set
{
_milesAtSixMPH = value;
RaisePropertyChanged(_distanceAtSixMPHPropertyName);
}
}
public int? MinutesAtTweleveMPH
{
get { return _minutesAtTweleveMPH; }
set
{
_minutesAtTweleveMPH = value;
RaisePropertyChanged(_minutesAtTweleveMPHPropertyName);
}
}
public ICommand StartMeterCommand
{
get
{
if(_startMeterCommand == null)
{
_startMeterCommand = new DelegateCommand<object>(OnStartMeter, CanStartMeter);
}
return _startMeterCommand;
}
}
public ICommand AddMinutesCommand
{
get
{
if(_addMinutesCommand == null)
{
_addMinutesCommand = new DelegateCommand<object>(OnAddMinutes, CanAddMinutes);
}
return _addMinutesCommand;
}
}
public ICommand ResetCommand
{
get
{
if(_resetCommand == null)
{
_resetCommand = new DelegateCommand<object>(OnResetCommand);
}
return _resetCommand;
}
}
}
private void OnStartMeter(object obj)
{
_eventAggregator.GetEvent<TaxiStartedEvent>().Publish(
new TaxiStarted()
{
EngagedOn = DateOfEntry.Value.Date + TimeOfEntry.Value,
EngagedState = SelectedState.Value
});
_isMeterStarted = true;
OnPropertyChanged(this,null);
}
And views communicate user actions like button clicks, tree view item selections, etc using commands. When user clicks on ‘Start the Meter’ button it invokes the method StartMeterCommand, which calls the method OnStartMeter which publishes the event to TotalViewModel using event aggregator and TaxiStartedEvent.
namespace TaxiModules.ViewModels
{
public class TotalViewModel:ObservableBase
{
...
private IEventAggregator _eventAggregator;
public TotalViewModel(IEventAggregator eventAggregator)
{
_eventAggregator = eventAggregator;
InitializePropertyNames();
InitializeModel();
SubscribeToEvents();
}
public decimal? TotalFare
{
get { return _totalFare; }
set
{
_totalFare = value;
RaisePropertyChanged(_totalFarePropertyName);
}
}
....
private void SubscribeToEvents()
{
_eventAggregator.GetEvent<TaxiStartedEvent>().Subscribe(OnTaxiStarted, ThreadOption.UIThread,false,(filter) => true);
_eventAggregator.GetEvent<TaxiOnMoveEvent>().Subscribe(OnTaxiMove, ThreadOption.UIThread, false, (filter) => true);
_eventAggregator.GetEvent<TaxiResetEvent>().Subscribe(OnTaxiReset, ThreadOption.UIThread, false, (filter) => true);
}
private void OnTaxiStarted(TaxiStarted taxiStarted)
{
Fares.Add(new EntryFare());
Fares.Add(new StateTaxFare(taxiStarted));
Fares.Add(new NightSurchargeFare(taxiStarted));
Fares.Add(new PeakHourWeekdayFare(taxiStarted));
SetTotalFare(Fares);
}
private void SetTotalFare(IEnumerable<IFare> fares)
{
TotalFare = (_totalFare ?? 0) + TaxiFareHelper.GetTotalFare(fares);
}
....
}
}
© ASP.net Weblogs or respective owner