Adventures in Windows 8: Understanding and debugging design time data in Expression Blend
Posted
by Laurent Bugnion
on Geeks with Blogs
See other posts from Geeks with Blogs
or by Laurent Bugnion
Published on Wed, 05 Sep 2012 21:53:21 GMT
Indexed on
2012/09/07
21:39 UTC
Read the original article
Hit count: 547
One of my favorite features in Expression Blend is the ability to attach a Visual Studio debugger to Blend. First let’s start by answering the question: why exactly do you want to do that?
Note: If you are familiar with the creation and usage of design time data, feel free to scroll down to the paragraph titled “When design time data fails”.
Creating design time data for your app
When a designer works on an app, he needs to see something to design. For “static” UI such as buttons, backgrounds, etc, the user interface elements are going to show up in Blend just fine. If however the data is fetched dynamically from a service (web, database, etc) or created dynamically, most probably Blend is going to show just an empty element.
The classical way to design at that stage is to run the application, navigate to the screen that is under construction (which can involve delays, need to log in, etc…), to measure what is on the screen (colors, margins, width and height, etc) using various tools, going back to Blend, editing the properties of the elements, running again, etc. Obviously this is not ideal.
The solution is to create design time data. For more information about the creation of design time data by mocking services, you can refer to two talks of mine “Deep dive MVVM” and “MVVM Applied From Silverlight to Windows Phone to Windows 8”. The source code for these talks is here and here.
Design time data in MVVM Light
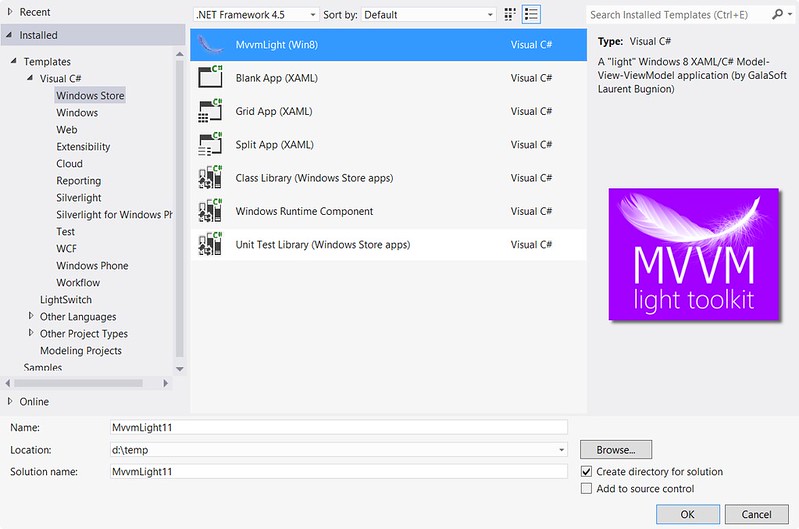
One of the main reasons why I developed MVVM Light is to facilitate the creation of design time data. To illustrate this, let’s create a new MVVM Light application in Visual Studio.
- Install MVVM Light from here: http://mvvmlight.codeplex.com (use the MSI in the Download section). After installing, make sure to read the Readme that opens up in your favorite browser, you will need one more step to install the Project Templates.
- Start Visual Studio 2012.
- Create a new MvvmLight (Win8) app.
- Run the application. You will see a string showing “Welcome to MVVM Light”.

- In the Solution explorer, right click on MainPage.xaml and select Open in Blend.
- Now you should see “Welcome to MVVM Light [Design]”
![Welcome to MVVM Light [design]](http://farm9.staticflickr.com/8438/7939579558_c37b7fd139.jpg "Welcome to MVVM Light [design]")
What happens here is that Expression Blend runs different code at design time than the application runs at runtime. To do this, we use design-time detection (as explained in a previous article) and use that information to initialize a different data service at design time. To understand this better, open the ViewModelLocator.cs file in the ViewModel folder and see how the DesignDataService is used at design time, while the DataService is used at runtime. In a real-life applicationm, DataService would be used to connect to a web service, for instance.
When design time data fails
Sometimes however, the creation of design time data fails. It can be very difficult to understand exactly what is happening. Expression Blend is not giving a lot of information about what happened. Thankfully, we can use a trick: Attaching a debugger to Expression Blend and debug the design time code.
In WPF and Silverlight (including Windows Phone 7), you could simply attach the debugger to Blend.exe (using the “Managed (v4.5, v4.0) code” option even for Silverlight!!)
In Windows 8 however, things are just a bit different. This is because the designer that renders the actual representation of the Windows 8 app runs in its own process. Let’s illustrate that:
- Open the file DesignDataService in the Design folder.
- Modify the GetData method to look like this:
public void GetData(Action<DataItem, Exception> callback)
{
    throw new Exception();

    // Use this to create design time data

    var item = new DataItem("Welcome to MVVM Light [design]");
    callback(item, null);
}
- Go to Blend and build the application.
- The build succeeds, but now the page is empty. The creation of the design time data failed, but we don’t get a warning message. We need to investigate what’s wrong.
- Close MainPage.xaml
- Go to Visual Studio and select the menu Debug, Attach to Process.
- Update: Make sure that you select “Managed (v4.5, v4.0) code” in the “Attach to” field.
- Find the process named XDesProc.exe. You should have at least two, one for the Visual Studio 2012 designer surface, and one for Expression Blend.
Unfortunately in this screen it is not obvious which is which. Let’s find out in the Task Manager.
- Press Ctrl-Alt-Del and select Task Manager
- Go to the Details tab and sort the processes by name.
- Find the one that says “Blend for Microsoft Visual Studio 2012 XAML UI Designer” and write down the process ID.
- Go back to the Attach to Process dialog in Visual Studio. sort the processes by ID and attach the debugger to the correct instance of XDesProc.exe.
- Open the MainViewModel (in the ViewModel folder)
- Place a breakpoint on the first line of the MainViewModel constructor.
- Go to Blend and open the MainPage.xaml again.
At this point, the debugger breaks in Visual Studio and you can execute your code step by step. Simply step inside the dataservice call, and find the exception that you had placed there. Visual Studio gives you additional information which helps you to solve the issue.

More info and Conclusion
I want to thank the amazing people on the Expression Blend team for being very fast in guiding me in that matter and encouraging me to blog about it. More information about the XDesProc.exe process can be found here. I had to work on a Windows 8 app for a few days without design time data because of an Exception thrown somewhere in the code, and it was really painful. With the debugger, finding the issue was a simple matter of stepping into the code until it threw the exception.
© Geeks with Blogs or respective owner