How to integrate Java ME SDK 3.2 with NetBeans
Posted
by SungmoonCho
on Oracle Blogs
See other posts from Oracle Blogs
or by SungmoonCho
Published on Tue, 25 Sep 2012 18:49:41 +0000
Indexed on
2012/09/25
21:44 UTC
Read the original article
Hit count: 458
/How To
Many people like to use Java ME SDK with IDEs. We provided instructions on how to integrate the SDK with NetBeans through the download page, and also through the release note, however, let me explain it here once again with some screen shots.
1. Download Java ME SDK and NetBeans plugin from here.
2. Install Java ME SDK first. You will have the emulator and the runtime on your machine. Also please unarchive the NetBeans plugin somewhere.
3. Launch NetBeans.
4. Go to "Tools" - "Plugins".
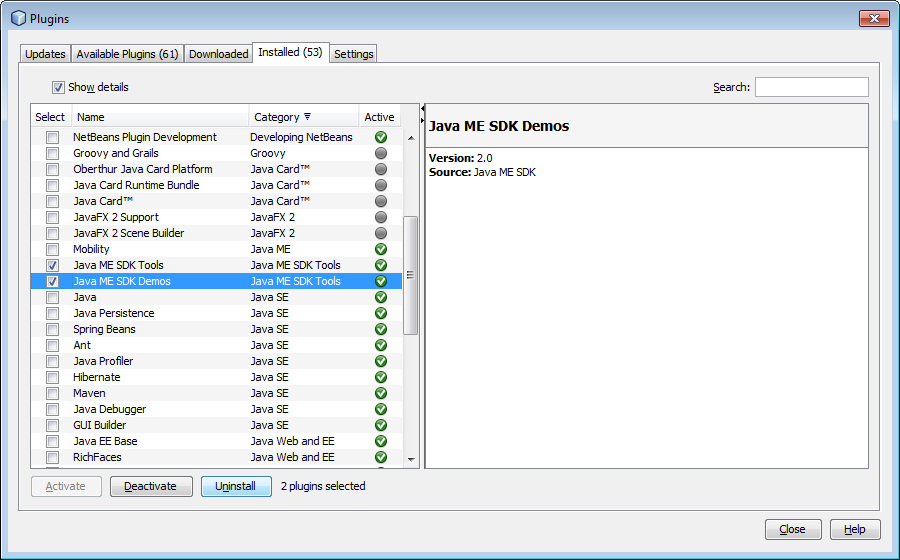
5. Check out the "Installed" tab. Check "Show details". If you see the previous version of Java ME SDK Tools installed already. Check those to uninstall them.
6. Go to "Settings" tab.
7. Click "Add", and provide the location of NetBeans plugin. In my case, it is "file:/C:/Users/sungcho/Downloads/nb-me-sdk-plugins-uc/updates.xml". Don't forget to add "updates.xml" at the end.
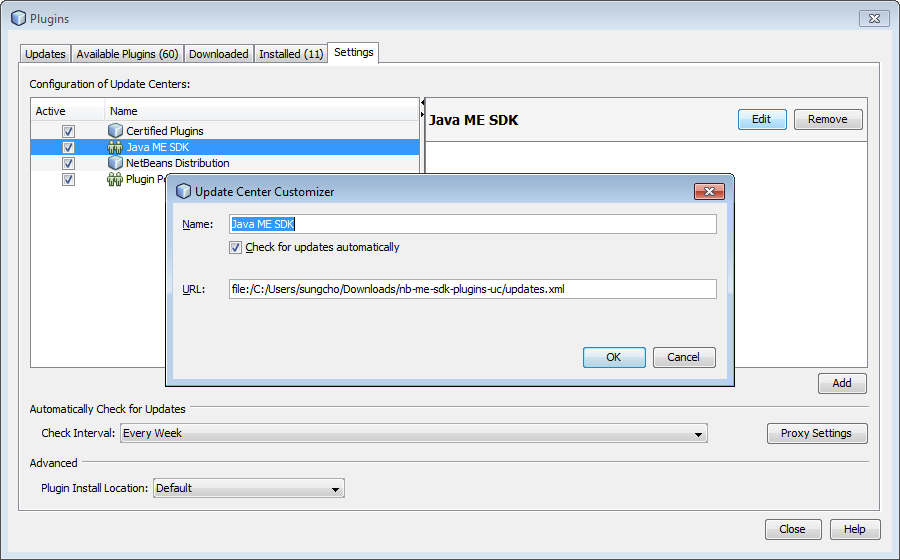
8. Click "Okay"
9. Click "Available Plugins" tab.
10. If you scroll down, you will see three Java ME SDK Tools. Check "Java ME SDK Tools" plugin. Also check others as you desire.
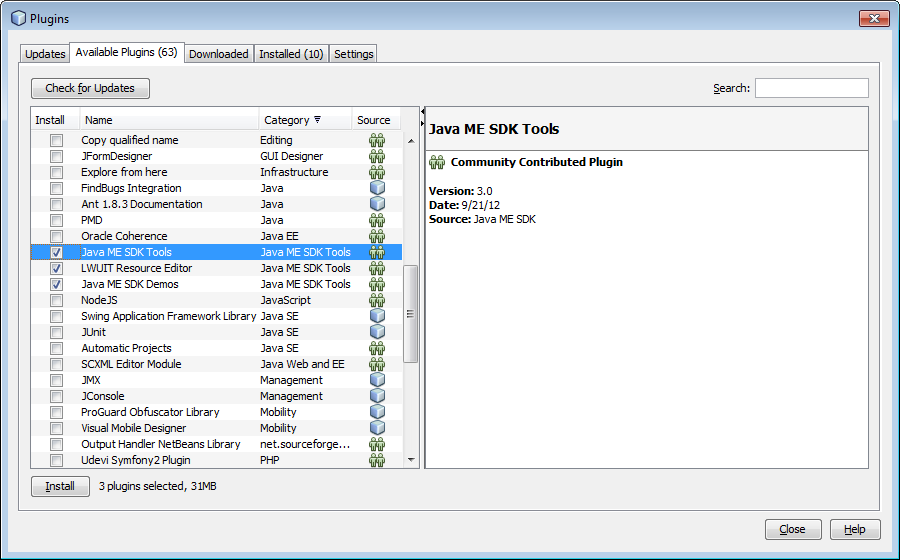
11. Follow the instruction and install them.
12. Restart NetBeans
13. That is it. Done. Now you will see Oracle Java ME SDK 3.2 in your Java Platform list.

© Oracle Blogs or respective owner